Sunday, January 30, 2011

Mmmmm...

Not only do I craft, but sometimes I even cook stuff. Ok, so maybe the only thing that falls under cooking in this recipe is making the sugar syrup, but whatever, I MADE it, lol.

Let's start with homemade strawberry sorbet. I took a number of recipes I found online and teased out the essentials: a quart of fresh strawberries, about 1.5 cups of sugar syrup, and 1tbsp of lime or lemon juice. I found person who added a packet of strawberry gelatin, so I did the same--this, in fact, made the sorbet a smidgen too sweet, but that mattered little for my application. I blended it all up (the sugar syrup needs to be cool, fyi) and then popped it in my ice cream maker for about 20 minutes. Then, it went straight to the freezer. After a few hours--and by the time my friend arrived--it was ready! Next step, making it alcoholic. Some recipes call for you to put about a 1/4 cup of vodka straight into the mix before putting it into the ice cream maker. But I knew that I wanted to make a cocktail out of it, so I didn't bother. I put 2 generous scoops of the sorbet into the blender, topped it w/ ~3/4 cup OJ and enough vodka to make me happy and blended it up... the result? delicious!

Thursday, January 27, 2011

Come in, come in, into my dungeon...

As most know, I live in a basement apartment.  There are good and bad things about this.  I love the apartment itself, with some vintage (read: old) appliances, a double oven and grill top.  A walk-in closet in the bedroom and a door between the extra-large vanity and toilet/shower area.  Plus, a huge section of the backyard solely for my use.  My landlord is also pretty cool and very nice.  But, it is still a basement, so sometimes water seeps in through the front door... and I live under a family of bouncing monkeys.  It's nice a cool in the summer but warm in the winter.  But anyway, here's a few views of where I live... (don't forget to mouse over the pictures for a few tags)

My livingroom/kitchen is one open space.  The entrance to the apt is to the right of this...


Annnnd, TJ himself.  At his desk, which is where he normally is (except for the next few days--he bought dead space 2 so he'll be stuck to the tv for a while) the frig, sink, grill top, ovens (didn't get a pic of that) are to the left of this pic...


Sunday, January 23, 2011

Something new...

Just a quick peek at a new craft I started working on.  No links necessary, I came up with this ish all on my own.


I've been trying to find the perfect beads or something for the eyes.  I'm not crazy about fish-crafts, but I do love my fish.  Suggestions?  Comments?

Friday, January 21, 2011

This week's crafts

I have a bit more me-time this semester, and so I've tackled a few things I wouldn't have have the time (read: energy) for last semester.  

First, I went to Home Goods (I do this like once a week and I'm not particularly proud of it, lol).  I've been looking for a lamp for a while now because in my dungeon--a post about it will be coming soon--there isn't much light in the livingroom.  I like sitting on my couch and reading whilst TJ produces music things on the other side of the room, in his pseudo-studio.  But, without light, this gets harder to do as the day sets.  Anywho, I found a table lamp that I really liked, and THEN found a little side table that was the PERFECT size.  All in the same visit!  Both on clearance!  It was a sign from the gods of consumerism, to say the least.  This $18 side table was red (stupid-me forgot to take a before picture) and had a dent in it and a few scratches.  Perfect opportunity to test out my refinishing skills.  The after picture is what you see to the right.  As you can see, my couch is red, so a red table just wouldn't have worked.  The blue I got from Home Depot is unfortunately TOO blue.  My next step (eventually) will be to try and stain this bad boy with coffee.  I have some chemical stain that would work, but coffee is much less... chemicalish. 


 This thing you see to the right is the lamp.  I paid $22 for it, a bit too much for my taste, but I love that it came with that plain while shade.  Plain white = easily craftable in my book.  I'm thinking some printed vellum or maybe even regular paper will make this plain-jane lamp a gem.  I'll sand down that black finish and paint it a brown that better matches my stuff.  That'll be a project to tackle when I find the perfect vellum or paper (or at least look through the stacks of paper I have to see if I already have the perfect paper).  Ignore that light switch in the background.  I'm trying to hide it.  It turns off the outlet that my TV and things are plugged into.  Hopefully people don't think it's for the lamp!  haha

Last and least is my attempt to "paint."  The classic crafts: painting and sewing, are just... well... not friends of mine.  I suck at both.  I have no particular attachment to pink and green, but as my first post exposed, the trend started in my craft area and I just can't stop it.  So, I wanted to jazz things up and add some "art."  This is honestly the best I can do.  I'm thinking I'll add words right over the pattern, but we'll see...  Maybe I'll quill some spirals and swirlies and make this thing POP.  hah.

Wednesday, January 12, 2011

Putting paper on things...

Ok, I have to admit that I love scrapbooking paper.  I don't like scrapbooking... really... I don't.  But the supplies that you can find in that section of the A&C stores are AmAzInG, and have so many other applications!  Anyway, scrapbooking paper is one of those things... I mean, paper in general is such a fun and versatile medium--that's why one of my linkspirations is Ann Martin's all things paper.  She mostly blogs about quilling, but often enough, she brings up a number of other paper crafts that I'm itching to try.  Anyway.  I don't remember where I first found out that "OH, I can stick paper onto things w/ Mod Podge" but once I did it, I didn't stop... at least not for like a week, lol.  Then, my scatterbrain caught on to something else (maybe clay sculpting?).  But anywho, here are some things I've stuck some scrapbooking paper onto!  (the method to do such a thing is simple--sand whatever it is down to remove any finish, cut paper to size, mod podge under and over, and--in the case of the coasters--seal with polyurethane)


These are shelves I got from Home Goods (the one store I will walk into and spend stupid amounts of money for things that are probably not usually worth it).  They were like $15 for all 3, but look fancy-shmancy with that nifty vintage look scrapbooking paper...


Yep, my dad and I, dressed the same.
I put some paper on these pictures frames... they used to be an ugly chrome type crap.  Got them for free from my old job--they were going to toss them out (and for good reason) but I saved them because, heck, frames are frames.


FYI, this is Shilo, a hybrid wolf pup that my parents brought up from Texas.
He was a beautiful animal inside and out :)

Ok, and last but not least, I made myself a bunch of coasters because, well, I needed them. They're made out of 4"x4" tile that run like 50 cents each? Maybe less, I don't remember.  I stuck felt to the backs to save the furniture--which is, after all, their intended purpose.

Really, it's all about finding paper you love and wanting to put it on everything. hahaha. I hope you enjoyed :)

Saturday, January 08, 2011

A little something I can't forget...

Last year had it's ups and downs, as most years do.  But these highs and lows were hitting extreme levels.  2010 brought things like: starting a few job at NPS :-D and beginning the long and arduous process of getting my masters :-/, TJ and I taking a "break," and--the hardest thing--finding out that my sister had cancer and that she had to go through multiple surgeries, chemotherapy, and radiation.  She was inspirationally strong as she fought through it and, before the year ended, was announced in remission!
For her birthday and just randomly, I crafted her a few things.  I actually only have pictures of two of those projects, though... So, here's what I got.


As a favor for those who attended her surprise birthday party, I got little candles and added an M (for her name), the pink breast cancer ribbon, ribbon and little blue flowers (blue is her favorite color) and a little inspirational poem on the back (that I forgot to take pictures of).  These came with a little card with yet another poem and some "instructions."  Something along the line of:  "Please light this candle when you think of M.  The gift of hope and light will guide her through these hard times."  Maybe it was more or less cheesy, I don't remember exactly.


Transferring images onto candles is a simple process that comes up on craft blogs all the time.  Print the image onto tissue paper, I pinned the tissue paper onto the candle, then use a heat gun to melt the wax just so, and ta-da!


I also made my sister a few pieces of jewelry.  But, I only have pictures of the following bracelet.  I rolled some paper beads, and bought all the essentials for making this, my first piece of jewelry.


If I find more pictures of the other things I made, I'll be sure to put them up :)

Thursday, January 06, 2011

Making a bag out of a book

Once upon a time I had an extraordinary amount of time for crafting and I crafted many a thing... once upon a time.  Back then, life was all 'what will I make next.'  Anyway, as you'll find, a common theme in my makings of things is making them as a gift for someone else.  It's really the reason I've gotten into so many varied types of crafts.  Also, once upon a time, I took up sewing for a moment (before realizing how horrible I was at it).  Using a very nifty how-to, found here, I was able to make a friend of mine a bag recycled from a book.  As pained as I was to rip out the pages of a book--I can hear my high school English teacher yelling "book abuse, book abuse!"--I did it for the art of crafting.  My version is a bit different from the tutorial (ugh, ugly big wooden handles... really?).  I added buttons on the outside and, on the inside, little "windows" for 2 pages from the book that I couldn't destroy.
This page reads "The world is dark, and light is precious/
Come closer, dear reader/You must trust me/I am telling you a story."

Also, I didn't just trash the sheets I savagely ripped out.  Instead, I blended them up into pulp (along with colored construction paper) to make paper and, in turn, these snazzy little note cards.

Wednesday, January 05, 2011

CaLynn's bouquet: the art of felt flowers

This entire project was totally based on/inspired by/stolen from Princess Lasertron and her amazing creations.  I'm not sure if she's the alpha and omega of felt flowers, but she's definitely the best I've ever seen.  Anyway, my friend over at a case of the crafties was going to order a bouquet for her amazing French wedding (can you even take your eyes off of that beautiful dress?!).  But, I was broke at the time and thought there could be no better gift than saving her the hundreds of dollars on a bouquet when I could try and craft something just as good.  My attempts were feeble at best and not nearly as good as PL's but I think it didn't turn out half bad :)  Here are a few views of the thing, with Charlie posing in the background and TJ as my hand model in one.


I also made the boutonniere and some pin things...

As I remained broke for a time and enjoyed the craft, I also made a few flowers for another friend of mine...


Happy crafting!

Tuesday, January 04, 2011

To begin...

A friend (codename: CaLynn, Site: a case of the crafties) told me once, quite some time ago, that I should start a craft blog.  Hers is all nice, organized, and she shares links to her inspirations/gives credit where credit is due.  I say this because I hope you don't expect mine to be!  haha, at least not the first couple of posts.  I, unfortunately, have lost a lot of the linkage to the inspirations for my older crafts, but if I find them, I will update.  Anyway, point is that I'm going to share a lot of the stuff I've made, and going forward, the stuff I make.  I know a whole of 5 people MIGHT read this, but I hope those 5 enjoy what I gots. :)

Lemme start with my craft space, which is itself a collection of organizing DIYs (and some store bought stuff).  In 3 parts, the center (and where I do all my work) looks like this...

Here, you can see my main craft table, it tilts, though I've never found a need for the tilting--not yet anyway. Ikea-bought legs (in the as is section :) provide some storage underneath, and the top is just an unfinished piece of plywood.  Also, note the Silhouette HD that my boyfriend (codename: TJ) got me for christmas.  Also, my DidItMyself (made by my very own imagination) coffee can organizer.  It is simply: 1 curtain rod (mid-grade, pretty sturdy), 8 repurposed coffee cans (with a hole drilled into the very top), and those useful S hooks that you can find at your local hardware store.  There's also an Ikea-bought basket that I can't see myself using much longer and will probably be replaced by more coffee cans.  Now, I've considered covering the cans with scrapbooking paper or possibly painting them, but for now, and I think for permanent, I'll be leaving it as is.  I like the metal  look.  I sort all my tools by craft: cutting things, sculpting things, painting things, etc.


If you were sitting at my craft table, to your right and left you'd see this and this:

Which is just me utilizing every inch of space I have for hanging things like my level, my rulers, my dremel, etc.


Now, part 2 of my craft space is my main storage:

What you see here is random stuff on top, paper things in those paper boxes, fabric and the obligatory "misc" bins, AND repurposed wine crates.  Each of those little green suckers is designated to a particular item-type or craft-type, including (but not limited to): my buttons, my stamping stuff, scrap jewelry, jewelry supplies (jump rings, o-rings, etc), etc.  Crammed between the wall and the shelf, you'll find poster board, canvases, and foam board--big things that fit nowhere else.


And a close-up of a few of my boxes:


And, last but certainly not least, is my other craft table--used for placing things that are done and need drying (note the cooling rack) and of course used for more storage:

It looks cluttered, but most of it is pretty organized.  A sewing machine I rarely use because I suck at sewing, the cooling rack with some old clay-creations that never even made it to the painting stage, more wine crates that I made into a bookshelf type thing (stores everything from paints, spray paints, chemicals, glues, quilling paper sorted by color in those cigar-boxes, nails, screws, hardware, stamp pads, etc etc etc), and lastly my AC Moore-bought ribbon holder which supports my collection of old and new small bottles which themselves hold itty bitty things like beads and brads and googly eyes and other stuff.  phew, that was a mouthful.


Time for closeups!


I mentioned to TJ today that I think I spend more time organizing my craft area more than I actually craft... it may or may not be true.  I go nuts when it gets all cluttered though, so I spend a lot of time re-sorting, organizing, and finding/creating new storage options.

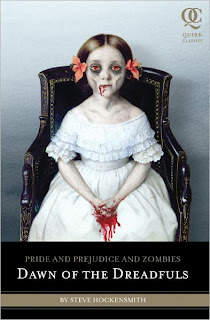
Well, this post alone took a lot out of me, so I hope you enjoyed it!  Expect more, eventually.  For now, I'm going to go read, and if you wanna know what, it's this: